1. Εισαγωγή
This manual provides essential information for setting up, operating, and maintaining your Lenovo L24q-30 23.8-inch QHD monitor. The L24q-30 is designed to deliver a superior visual experience with its QHD (2560 x 1440) resolution, IPS panel, and >99% sRGB color gamut. It features AMD FreeSync technology, a 75Hz refresh rate, and a 4ms response time for smooth visuals. The monitor is TüV Eye Comfort certified, reducing blue light and flicker for extended viewing comfort. Connectivity options include HDMI 1.4 and DisplayPort 1.2, along with a 3.5mm audio output.
2. Πληροφορίες Ασφάλειας
Please read this section carefully before using your monitor to ensure safe and proper operation.
- Τοποθετείτε πάντα την οθόνη σε μια σταθερή, επίπεδη επιφάνεια για να αποτρέψετε την πτώση της.
- Βεβαιωθείτε ότι υπάρχει σωστός αερισμός γύρω από την οθόνη. Μην φράζετε τα ανοίγματα εξαερισμού.
- Χρησιμοποιήστε μόνο τον προσαρμογέα ρεύματος και τα καλώδια που παρέχονται με την οθόνη.
- Μην εκθέτετε την οθόνη σε βροχή ή υγρασία για να αποφύγετε ηλεκτροπληξία.
- Αποσυνδέστε την οθόνη από την πρίζα πριν την καθαρίσετε.
- Αποφύγετε να αγγίζετε την οθόνη με αιχμηρά αντικείμενα.
- If any unusual smoke, noise, or odor occurs, immediately unplug the monitor and contact customer support.
3. Περιεχόμενα συσκευασίας
Βεβαιωθείτε ότι όλα τα αντικείμενα υπάρχουν στη συσκευασία σας:
- Lenovo L24q-30 Monitor
- Βάση βάσης οθόνης
- Βάση οθόνης με λαιμό
- Καλώδιο τροφοδοσίας
- Καλώδιο HDMI
- Quick Setup Guide / Warranty Card
4. Ρύθμιση
4.1 Συναρμολόγηση της βάσης οθόνης
- Carefully remove the monitor from its packaging, placing it face down on a soft, clean cloth to protect the screen.
- Συνδέστε τον λαιμό της βάσης στην οθόνη ευθυγραμμίζοντας τις γλωττίδες και πιέζοντας μέχρι να κουμπώσει στη θέση του.
- Συνδέστε τη βάση στήριξης στον λαιμό της βάσης. Στερεώστε την με τη βίδα στερέωσης που βρίσκεται στην κάτω πλευρά της βάσης.
- Σηκώστε απαλά την συναρμολογημένη οθόνη και τοποθετήστε την σε όρθια θέση σε μια σταθερή επιφάνεια.

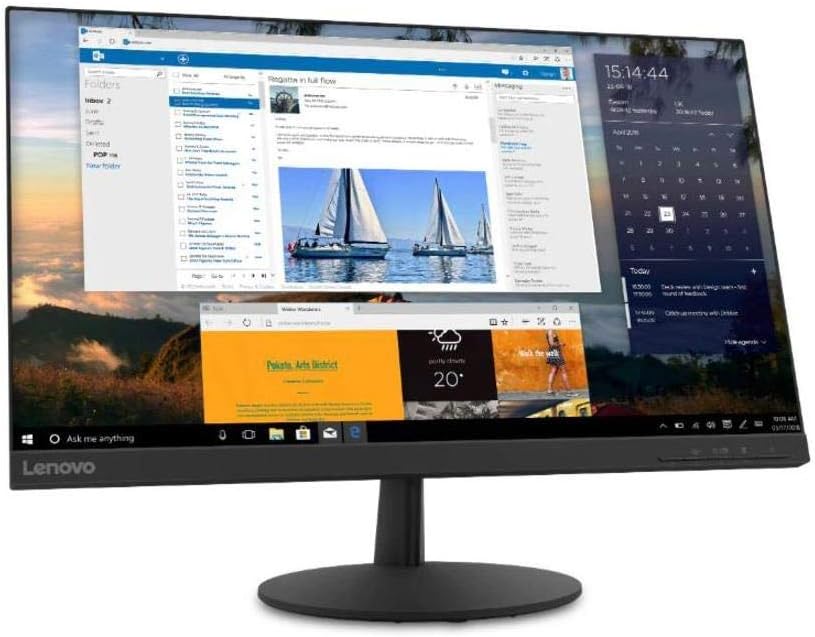
Εικόνα 4.1: Πλευρά view of the monitor with the stand attached, showing its slim profile.
4.2 Καλώδια σύνδεσης
Ανατρέξτε στην παρακάτω εικόνα για τις θέσεις των θυρών στο πίσω μέρος της οθόνης.
Εικόνα 4.2: Πίσω view of the monitor, highlighting the power input, HDMI, DisplayPort, and audio output ports.
- Σύνδεση ρεύματος: Connect the power cable to the monitor's power input port, then plug the other end into a grounded electrical outlet.
- Σύνδεση βίντεο:
- For HDMI: Connect one end of the HDMI cable to the monitor's HDMI port and the other end to the HDMI output port on your computer.
- For DisplayPort: Connect one end of the DisplayPort cable to the monitor's DisplayPort and the other end to the DisplayPort output on your computer.
- Έξοδος ήχου (Προαιρετικά): If you wish to connect external speakers or headphones directly to the monitor, plug them into the 3.5mm audio out port.
4.3 Αρχική ενεργοποίηση
Press the power button located on the front or bottom bezel of the monitor. The power indicator light will illuminate. If no image appears, ensure all cables are securely connected and your computer is powered on.
5. Λειτουργία της οθόνης
5.1 Στοιχεία ελέγχου οθόνης (OSD)
The monitor features control buttons, typically located on the bottom right bezel, to access and navigate the On-Screen Display (OSD) menu. These buttons allow you to adjust various monitor settings.
- Κουμπί λειτουργίας: Ενεργοποιεί ή απενεργοποιεί την οθόνη.
- Κουμπί μενού: Ανοίγει το μενού OSD.
- Κουμπιά πλοήγησης (Πάνω/Κάτω/Αριστερά/Δεξιά): Χρησιμοποιείται για πλοήγηση στις επιλογές του μενού και προσαρμογή τιμών.
- Κουμπί Εισαγωγής/Επιλογής: Επιβεβαιώνει μια επιλογή ή εισέρχεται σε ένα υπομενού.
- Κουμπί εξόδου: Έξοδος από το τρέχον μενού ή επιστροφή στο προηγούμενο επίπεδο.
5.2 Προσαρμογή ρυθμίσεων
Για να προσαρμόσετε τις ρυθμίσεις της οθόνης:
- Πατήστε το Μενού κουμπί για να ανοίξετε το μενού OSD.
- Use the navigation buttons to select a category (e.g., Picture, Color, Input).
- Τύπος Εισαγωγή/Επιλογή to enter the category.
- Use navigation buttons to adjust values (e.g., Brightness, Contrast, Color Temperature) or select sub-options.
- Τύπος Εισαγωγή/Επιλογή για επιβεβαίωση αλλαγών.
- Τύπος Εξοδος για έξοδο από το μενού OSD.
5.3 Activating AMD FreeSync
To utilize AMD FreeSync technology, ensure your graphics card supports FreeSync and that it is enabled in your graphics card's control panel. Then, navigate to the OSD menu on your monitor, typically under a 'Gaming' or 'Display' section, and enable the FreeSync option.
5.4 Ρύθμιση ρυθμού ανανέωσης
The monitor supports a 75Hz refresh rate. To set this, you may need to adjust the display settings within your operating system (e.g., Windows Display Settings or macOS System Preferences) after connecting the monitor. Select the highest available refresh rate for optimal performance.
6. Συντήρηση
6.1 Καθαρισμός της οθόνης
- Οθόνη: Σκουπίστε απαλά την οθόνη με ένα μαλακό πανί που δεν αφήνει χνούδι. Για επίμονα σημάδια, τρίψτε ελαφρά.ampΣκουπίστε το πανί με νερό ή με καθαριστικό οθόνης χωρίς αμμωνία ή αλκοόλ. Μην ψεκάζετε καθαριστικό απευθείας στην οθόνη.
- Casing: Χρησιμοποιήστε ένα μαλακό, στεγνό πανί για να σκουπίσετε την οθόνη casinζ. Αποφύγετε τα λειαντικά καθαριστικά ή τους διαλύτες.
- Αποσυνδέετε πάντα την οθόνη πριν την καθαρίσετε.
6.2 Αποθήκευση
Εάν αποθηκεύετε την οθόνη για μεγάλο χρονικό διάστημα, αποσυνδέστε όλα τα καλώδια και συσκευάστε την στην αρχική της συσκευασία, εάν είναι δυνατόν. Φυλάξτε την σε δροσερό, ξηρό μέρος, μακριά από άμεσο ηλιακό φως και ακραίες θερμοκρασίες.
7. Αντιμετώπιση Προβλημάτων
Εάν αντιμετωπίσετε προβλήματα με την οθόνη σας, ανατρέξτε στα ακόλουθα συνηθισμένα προβλήματα και λύσεις:
| Πρόβλημα | Πιθανή Λύση |
|---|---|
| Δεν υπάρχει τροφοδοσία / Η λυχνία LED τροφοδοσίας είναι σβηστή | Ensure the power cable is securely connected to both the monitor and the electrical outlet. Check the power outlet with another device. |
| Δεν υπάρχει εικόνα / Μήνυμα "Χωρίς σήμα" | Verify the video cable (HDMI/DisplayPort) is securely connected to both the monitor and the computer. Ensure the correct input source is selected in the OSD menu. Check if the computer is powered on and not in sleep mode. |
| Η εικόνα είναι θολή ή παραμορφωμένη | Ensure the monitor's native resolution (2560x1440) is selected in your computer's display settings. Adjust brightness, contrast, and sharpness settings in the OSD menu. |
| Η οθόνη τρεμοπαίζει | Check the video cable for damage or loose connections. Ensure the refresh rate is set correctly (75Hz). Disable FreeSync temporarily to see if it resolves the issue. |
| Τα χρώματα είναι λανθασμένα | Adjust color settings (Color Temperature, Gamma) in the OSD menu. Reset color settings to factory defaults. |
8. Προδιαγραφές
| Χαρακτηριστικό | Λεπτομέρεια |
|---|---|
| Όνομα μοντέλου | Lenovo L24q-30 |
| Μέγεθος οθόνης | 23.8 ίντσες |
| Τύπος πίνακα | IPS (In-Plane Switching) |
| Ψήφισμα | QHD (2560 x 1440) |
| Αναλογία διαστάσεων | 16:9 |
| Ρυθμός ανανέωσης | 75 Hz |
| Χρόνος απόκρισης | 4 ms |
| Χρωματική γκάμα | > 99% sRGB |
| Δυναμική αναλογία αντίθεσης | 3 Μ:1 |
| Viewγωνιά | 178° (Υ/Β) |
| Συνδεσιμότητα | 1x HDMI 1.4, 1x DisplayPort 1.2, 1x Έξοδος Ήχου (3.5 χιλ.) |
| Συμβατότητα βάσης VESA | 100 mm x 100 mm |
| Πιστοποίηση άνεσης ματιών | TüV Rheinland Eye Comfort |
| Διαστάσεις (με βάση) | Approx. 21 x 38 x 49 inches (W x D x H) - Note: These dimensions may refer to packaging. Refer to product documentation for exact monitor dimensions. |
| Βάρος (με βάση) | Approx. 1 pound - Note: This weight appears to be incorrect for a monitor. Refer to product documentation for exact weight. |
| Χρώμα | Μαύρος |
9. Εγγύηση και υποστήριξη
For detailed warranty information, please refer to the warranty card included in your product package or visit the official Lenovo support website. The warranty covers manufacturing defects under normal use conditions.
For technical support, driver downloads, or service inquiries, please visit the Lenovo Support website or contact their customer service department. Have your monitor's model number (L24q-30) and serial number ready when contacting support.
Υποστήριξη της Lenovo Webτοποθεσία: support.lenovo.com


