Εισαγωγή
This manual provides detailed instructions for the installation, operation, and maintenance of your Venstar T1900 Residential Slimline Platinum Thermostat. Please read this manual thoroughly before attempting to install or operate the thermostat to ensure proper function and to avoid potential damage.
Σημαντικές πληροφορίες για την ασφάλεια
- Να διακόπτετε πάντα την παροχή ρεύματος στο σύστημα θέρμανσης/ψύξης από τον κύριο διακόπτη κυκλώματος ή το κιβώτιο ασφαλειών πριν από την εγκατάσταση ή τη συντήρηση του θερμοστάτη.
- This thermostat operates on 24 Volts AC. Do not connect to line voltage (120V ή 240V).
- Η εγκατάσταση θα πρέπει να εκτελείται από εξειδικευμένο τεχνικό εάν δεν είστε εξοικειωμένοι με την ηλεκτρική καλωδίωση.
- Do not short circuit the terminals on the gas valve or at the system control to test the thermostat. This will damage the thermostat and void the warranty.
- Ensure all wiring connections are secure and insulated to prevent short circuits.
Περιεχόμενα συσκευασίας
Βεβαιωθείτε ότι το πακέτο σας περιέχει τα ακόλουθα στοιχεία:
- Venstar T1900 Thermostat Unit
- Εξαρτήματα τοποθέτησης (βίδες και αγκύρια τοίχου)
- Εγχειρίδιο χρήστη (αυτό το έγγραφο)
Προϊόν Πάνωview
The Venstar T1900 is a 7-day programmable digital thermostat designed for residential use. It offers precise temperature control and energy-saving scheduling capabilities. This thermostat is compatible with heat/cool, heat pump, and dual-fuel systems, controlling up to three heat stages και δύο cool stages.
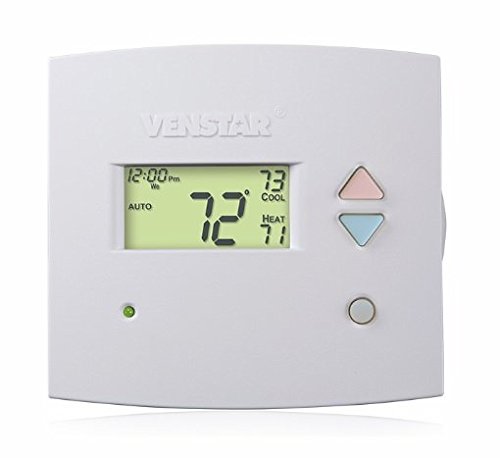
Εικόνα 1: Εμπρός view of the Venstar T1900 Thermostat. This image displays the thermostat's LCD screen and control buttons, indicating its slimline design.
Βασικά Χαρακτηριστικά:
- Προγραμματισμός 7 ημερών: Επιτρέπει προσαρμοσμένα προγράμματα θέρμανσης και ψύξης για κάθε ημέρα της εβδομάδας.
- Συμβατότητα συστήματος: Works with heat/cool, dual-fuel, and heat pump systems.
- Multi-Stage Έλεγχος: Manages up to three heat stages και δύο cool stages.
- Δυνατότητα τηλεχειρισμού: Controllable by phone using an optional add-on (sold separately).
- Automatic or Manual Operation: Provides flexibility for scheduled or on-demand temperature adjustments.
Οδηγός εγκατάστασης
Απαιτούμενα εργαλεία:
- Κατσαβίδι (Phillips ή/και ίσιο)
- Drill with appropriate drill bit (if installing new wall anchors)
- Απογυμνωτές
- Μολύβι
- Επίπεδο (προαιρετικό)
1. Απενεργοποιήστε την ισχύ
Locate the circuit breaker or fuse box that controls your heating and cooling system. Turn off the power completely before proceeding with any wiring.
2. Αφαιρέστε τον παλιό θερμοστάτη (εάν υπάρχει)
- Αφαιρέστε προσεκτικά το κάλυμμα του παλιού σας θερμοστάτη.
- Take a picture of the existing wiring connections for reference.
- Label each wire with the terminal designation it was connected to (e.g., R, G, Y, W).
- Αποσυνδέστε τα καλώδια και αφαιρέστε την πλάκα στήριξης του παλιού θερμοστάτη από τον τοίχο.
3. Τοποθετήστε τη νέα βάση θερμοστάτη
- Separate the front cover of the T1900 thermostat from its base plate.
- Position the base plate on the wall where you want to install the thermostat. Ensure it is level.
- Σημειώστε τις οπές στερέωσης με ένα μολύβι.
- Ανοίξτε τρύπες-οδηγούς εάν είναι απαραίτητο και τοποθετήστε ούπα τοίχου.
- Secure the thermostat base plate to the wall using the provided screws.
4. Καλωδίωση
Connect the wires from your HVAC system to the corresponding terminals on the T1900 thermostat base. Refer to the wiring diagram provided with your specific HVAC system for precise connections. Ensure wires are stripped approximately 3/8 inch and securely fastened under the terminal screws.
Κοινές ονομασίες τερματικών:
- R/Rc/Rh: 24V Power (Heating/Cooling)
- C: Common (24V return)
- G: Ανεμιστήρας
- Y/Y1: Συμπιεστής Stage 1 (ψύξη)
- Υ2: Συμπιεστής Stage 2 (ψύξη)
- W/W1: Θερμότητα Stage 1 (Θέρμανση)
- Ε2: Θερμότητα Stage 2 (Θέρμανση)
- O/B: Reversing Valve (Heat Pumps)
Note: The T1900 supports various system types. Consult the detailed wiring diagrams in the full installation manual for specific configurations (e.g., heat pump with auxiliary heat, conventional multi-stagηλεκτρονικά συστήματα).
5. Συνδέστε τον θερμοστάτη στη βάση
Once wiring is complete and verified, carefully align the thermostat front cover with the mounted base plate and snap it into place.
6. Επαναφορά ισχύος
Return to your circuit breaker or fuse box and restore power to your heating and cooling system.
Αρχική ρύθμιση
Upon initial power-up, the thermostat may prompt you to configure basic settings. Follow the on-screen instructions to set the current date, time, and system type (e.g., Conventional, Heat Pump).
System Type Configuration:
It is crucial to correctly configure the thermostat for your specific HVAC system. Incorrect settings can lead to improper operation or damage. Access the installer settings menu (refer to the full installation guide for specific button sequences) to select:
- Τύπος συστήματος: Heat/Cool, Heat Pump, Dual Fuel
- Αριθμός θερμότητας Stages
- Αριθμός Cool Stages
- Reversing Valve Operation: O (Ψύξη) ή B (Θέρμανση)
Οδηγίες Λειτουργίας
Κατανόηση της οθόνης:
The LCD screen displays the current temperature, set temperature, system mode, fan mode, time, and programming status. Refer to the icons and indicators on the screen for current operational status.
Setting System Mode:
Πατήστε το ΤΡΟΠΟΣ κουμπί για εναλλαγή μεταξύ των διαθέσιμων λειτουργιών συστήματος:
- ΘΕΡΜΟΤΗΤΑ: The system will operate to maintain the heating setpoint.
- ΔΡΟΣΕΡΟΣ: The system will operate to maintain the cooling setpoint.
- ΑΥΤΟ: The thermostat automatically switches between heating and cooling as needed to maintain the set temperature range.
- OFF: Το σύστημα θέρμανσης και ψύξης είναι απενεργοποιημένο.
Setting Fan Mode:
Πατήστε το FAN κουμπί για εναλλαγή μεταξύ λειτουργιών ανεμιστήρα:
- ΑΥΤΟ: Ο ανεμιστήρας λειτουργεί μόνο όταν το σύστημα θέρμανσης ή ψύξης λειτουργεί ενεργά.
- ΕΠΙ: Ο ανεμιστήρας λειτουργεί συνεχώς, ανεξάρτητα από τις κλήσεις θέρμανσης ή ψύξης.
Ρύθμιση θερμοκρασίας:
Χρησιμοποιήστε το UP και ΚΑΤΩ arrow buttons to adjust the desired temperature setpoint. In programmable modes, this will temporarily override the schedule until the next scheduled change.
Programming Schedules (7-Day):
The T1900 allows for 7-day programming, enabling different schedules for each day of the week. This feature helps save energy by adjusting temperatures when you are away or asleep.
- Πατήστε το ΠΡΟΓΡΑΜΜΑ κουμπί για είσοδο σε λειτουργία προγραμματισμού.
- Χρησιμοποιήστε το ΗΜΕΡΑ button to select the day or group of days you wish to program (e.g., Mon-Fri, Sat-Sun, or individual days).
- Χρησιμοποιήστε το ΦΟΡΑ button to cycle through the four available periods: Wake, Leave, Return, Sleep.
- Χρησιμοποιήστε το UP και ΚΑΤΩ arrow buttons to set the desired temperature for each period.
- Χρησιμοποιήστε το ΑΜΠΑΡΙ button to exit programming mode or save changes.
Refer to the detailed programming section in the full user guide for advanced options and specific button sequences.
Remote Control (Optional Add-on):
The Venstar T1900 thermostat can be controlled remotely via a phone using an optional add-on module (sold separately). This module connects to the thermostat and allows for remote access and control through a dedicated application. Installation and setup instructions for the remote control module are provided with the module itself.
Συντήρηση
Cleaning the Thermostat:
Για να διατηρήσετε την εμφάνιση και τη λειτουργικότητα του θερμοστάτη σας, σκουπίζετε περιοδικά το εξωτερικό με ένα μαλακό,amp πανί. Μην χρησιμοποιείτε λειαντικά καθαριστικά, διαλύτες ή χημικά σπρέι, καθώς αυτά μπορεί να προκαλέσουν ζημιά στα πλαστικά και τα ηλεκτρονικά εξαρτήματα.
Αντικατάσταση μπαταρίας:
The Venstar T1900 thermostat does not require batteries for operation as it is powered by the 24V AC system.
Αντιμετώπιση προβλημάτων
If you experience issues with your Venstar T1900 thermostat, consult the following common problems and solutions:
| Πρόβλημα | Πιθανή αιτία | Διάλυμα |
|---|---|---|
| Η οθόνη του θερμοστάτη είναι κενή | Δεν υπάρχει ρεύμα στον θερμοστάτη. | Ελέγξτε τον διακόπτη κυκλώματος για το σύστημα HVAC σας. Βεβαιωθείτε ότι όλες οι συνδέσεις καλωδίωσης είναι ασφαλείς. |
| Heating/Cooling system does not respond | Επιλέχθηκε λανθασμένη λειτουργία συστήματος. Πρόβλημα καλωδίωσης. Κλείδωμα συστήματος. | Verify the system mode (HEAT/COOL/AUTO). Check wiring connections. Wait 5 minutes for system lockout to reset. |
| Η ένδειξη θερμοκρασίας φαίνεται ανακριβής | Thermostat location; sensor obstruction. | Ensure the thermostat is not exposed to direct sunlight, drafts, or heat sources. Clean any dust from the thermostat vents. |
| Programming schedule is not working | Program not saved; temporary override active; incorrect time/day setting. | Ensure programs are saved. Check if a temporary override is active and cancel it. Verify current time and day settings. |
| Fan runs continuously in AUTO mode | Fan mode set to ON; wiring issue. | Press the FAN button to ensure it is set to AUTO. Check fan wiring. |
If these solutions do not resolve the issue, please contact customer support or a qualified HVAC technician.
Προδιαγραφές
| Χαρακτηριστικό | Προσδιορισμός |
|---|---|
| Μάρκα | Venstar |
| Όνομα μοντέλου | Venstar T1900 |
| Τύπος ελεγκτή | Πιέστε το κουμπί |
| Ειδικό χαρακτηριστικό | Προγραμματιζόμενος |
| Χρώμα | Λευκό |
| Ειδικές Χρήσεις Προϊόντος | Heat Pump, Heater |
| Τύπος ελέγχου θερμοκρασίας | Programmable, Smart/Remote (with add-on) |
| Τομtage | 24 Volt AC |
| Τύπος οθόνης | LCD ή LED |
| Μέθοδος Ελέγχου | Remote (with add-on) |
| Οπίσθιος φωτισμός | Ναί |
| Διαστάσεις προϊόντος | 5.3 x 2 x 2 ίντσες |
| Βάρος αντικειμένου | 0.01 ουγγιές |
| Απαιτούνται μπαταρίες; | Οχι |
Πληροφορίες εγγύησης
Venstar products are manufactured to high-quality standards. This product is covered by a limited warranty against defects in materials and workmanship. The specific terms and duration of the warranty may vary. Please refer to the warranty card included with your product or visit the official Venstar webιστότοπος για λεπτομερείς πληροφορίες εγγύησης και διαδικασίες εγγραφής.
Υποστήριξη Πελατών
For technical assistance, troubleshooting, or warranty inquiries, please contact Venstar customer support. You can typically find contact information, including phone numbers and email addresses, on the official Venstar webιστοσελίδα (www.venstar.com) ή στη συσκευασία του προϊόντος.
When contacting support, please have your thermostat model number (T1900) and any relevant purchase information ready.


