1. Εισαγωγή
Ευχαριστώ για την αγοράasing the Generic 21V Lithium-Ion Electric Wrench Set. This powerful and versatile tool is designed for efficient tightening and loosening of bolts and nuts, as well as drilling tasks in various materials. This manual provides essential information for safe operation, maintenance, and troubleshooting to ensure optimal performance and longevity of your tool.
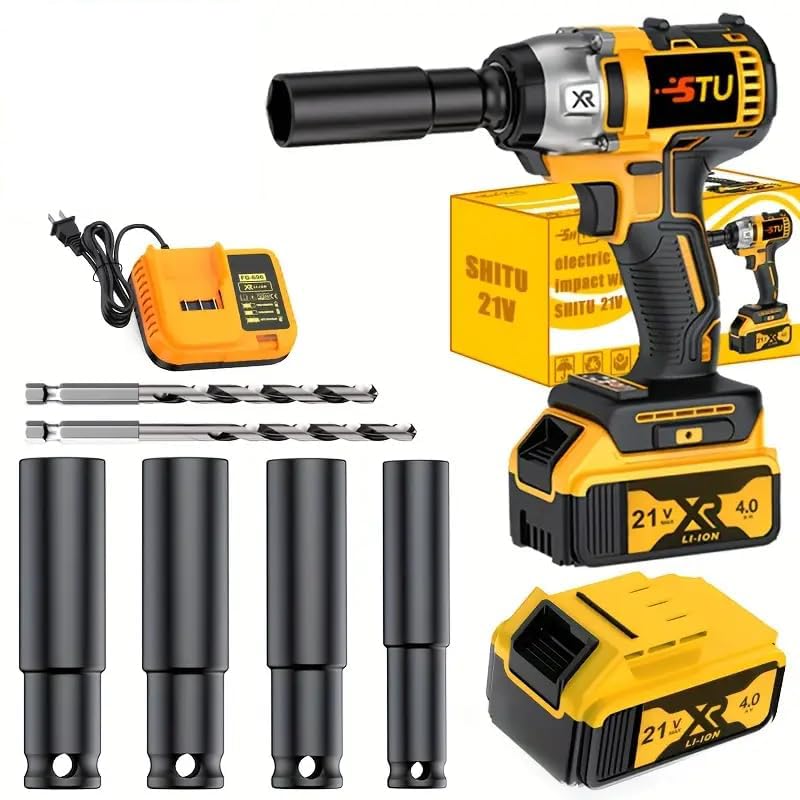
Image 1: The Generic 21V Lithium-Ion Electric Wrench Set. This image displays the main electric wrench unit, a lithium-ion battery, and various accessories, highlighting the compact and portable design of the tool.
2. Οδηγίες ασφαλείας
Να ακολουθείτε πάντα τις βασικές προφυλάξεις ασφαλείας όταν χρησιμοποιείτε ηλεκτρικά εργαλεία για να μειώσετε τον κίνδυνο πυρκαγιάς, ηλεκτροπληξίας και τραυματισμού.
- Ασφάλεια χώρου εργασίας: Διατηρείτε τον χώρο εργασίας σας καθαρό και καλά φωτισμένο. Οι ακατάστατοι ή σκοτεινοί χώροι προκαλούν ατυχήματα. Μην χρησιμοποιείτε ηλεκτρικά εργαλεία σε εκρηκτικές ατμόσφαιρες, όπως παρουσία εύφλεκτων υγρών, αερίων ή σκόνης.
- Ηλεκτρική ασφάλεια: Αποφύγετε την επαφή του σώματος με γειωμένες επιφάνειες όπως σωλήνες, καλοριφέρ, εστίες και ψυγεία. Μην εκθέτετε τα ηλεκτρικά εργαλεία σε βροχή ή υγρές συνθήκες.
- Προσωπική ασφάλεια: Να φοράτε πάντα προστατευτικά γυαλιά. Να χρησιμοποιείτε προστατευτικά ακοής όταν χειρίζεστε το εργαλείο για μεγάλα χρονικά διαστήματα. Ντύνεστε σωστά. Αποφύγετε τα φαρδιά ρούχα ή κοσμήματα που μπορεί να πιαστούν σε κινούμενα μέρη.
- Χρήση και φροντίδα εργαλείου: Μην πιέζετε το ηλεκτρικό εργαλείο. Χρησιμοποιήστε το σωστό ηλεκτρικό εργαλείο για την εφαρμογή σας. Αποσυνδέστε το φις από την πηγή τροφοδοσίας ή/και την μπαταρία από το ηλεκτρικό εργαλείο πριν κάνετε οποιεσδήποτε ρυθμίσεις, αλλάξετε αξεσουάρ ή αποθηκεύσετε τα ηλεκτρικά εργαλεία.
- Χρήση και φροντίδα της μπαταρίας: Επαναφορτίστε μόνο με τον φορτιστή που καθορίζεται από τον κατασκευαστή. Μην χρησιμοποιείτε μπαταρία ή εργαλείο που έχει υποστεί ζημιά ή έχει τροποποιηθεί.
3. Περιεχόμενα συσκευασίας
Αποσυσκευάστε προσεκτικά το κουτί και βεβαιωθείτε ότι όλα τα αντικείμενα υπάρχουν και είναι σε καλή κατάσταση. Εάν λείπουν ή έχουν υποστεί ζημιά κάποια αντικείμενα, επικοινωνήστε με τον πωλητή σας.
- 21V Electric Wrench Unit
- Lithium-Ion Battery (1 unit)
- Φορτιστής μπαταρίας
- Assorted Drill Bits (including twist drills and impact drills)
- Storage Case/Paper Box
- Additional Accessories (specific items may vary, refer to product packaging)
4. Ρύθμιση
4.1 Φόρτιση της μπαταρίας
- Συνδέστε τον φορτιστή σε μια τυπική πρίζα.
- Τοποθετήστε την μπαταρία στον φορτιστή. Βεβαιωθείτε ότι έχει τοποθετηθεί σωστά.
- Allow the battery to charge fully. The charger typically has an indicator light that changes color or turns off when charging is complete. The fast-charging function allows for quick charging times.
- Μόλις φορτιστεί, αποσυνδέστε την μπαταρία από τον φορτιστή και αποσυνδέστε τον φορτιστή από την πρίζα.
4.2 Τοποθέτηση της μπαταρίας
- Align the charged battery with the battery slot on the base of the electric wrench.
- Slide the battery into the slot until it clicks securely into place. Ensure it is firmly attached before operation.
4.3 Τοποθέτηση εξαρτημάτων
- Ensure the wrench is turned off and the battery is removed before attaching or changing accessories.
- Select the appropriate socket or drill bit for your task.
- Insert the accessory into the chuck or anvil of the wrench.
- Secure the accessory firmly. For chucks, tighten until the accessory is held securely. For anvils, ensure the pin or ring locks the socket in place.
5. Οδηγίες λειτουργίας
5.1 Γενική Λειτουργία
- Ενεργοποίηση/Απενεργοποίηση: Press the trigger to start the wrench. Release the trigger to stop it.
- Έλεγχος κατεύθυνσης: Use the forward/reverse switch, typically located near the trigger, to select the desired rotation direction (tightening or loosening).
- Έλεγχος ταχύτητας: The wrench may feature variable speed control, allowing you to adjust the speed by varying the pressure on the trigger.
5.2 Tightening and Loosening Bolts/Nuts
- Επιλέξτε το σωστό μέγεθος υποδοχής για το συνδετήρα.
- Attach the socket securely to the wrench.
- Set the direction switch to the desired mode (forward for tightening, reverse for loosening).
- Place the socket over the fastener, ensuring a snug fit.
- Press the trigger to operate the wrench. Apply steady pressure. The high-performance motor provides strong torque for efficient operation.
- Release the trigger once the fastener is tightened or loosened.
5.3 Εργασίες Γεωτρήσεων
This set includes various drill bits suitable for wood, metal, and plastic.
- Επιλέξτε το κατάλληλο τρυπάνι για το υλικό και το μέγεθος της οπής.
- Securely attach the drill bit to the wrench's chuck.
- Mark the drilling location on the workpiece.
- Hold the wrench firmly, ensuring a stable grip with the ergonomically designed anti-slip handle.
- Ξεκινήστε το τρύπημα με χαμηλή ταχύτητα, αυξάνοντας σταδιακάasing as the bit penetrates the material.
- Maintain steady pressure and keep the drill bit straight.
- Withdraw the drill bit slowly once the hole is complete.
6. Συντήρηση
6.1 Καθαρισμός
- Πάντα να αποσυνδέετε την μπαταρία πριν από τον καθαρισμό.
- Σκουπίστε το εργαλείο με ένα καθαρό,amp πανί. Μην χρησιμοποιείτε σκληρά χημικά ή λειαντικά καθαριστικά.
- Διατηρείτε τα ανοίγματα εξαερισμού καθαρά από σκόνη και υπολείμματα για να αποφύγετε την υπερθέρμανση.
6.2 Αποθήκευση
- Store the electric wrench and its accessories in the provided storage case. This keeps tools tidy and prevents loss of accessories.
- Φυλάσσετε σε ξηρό, δροσερό μέρος, μακριά από άμεσο ηλιακό φως και υγρασία.
- Να φυλάσσεται μακριά από παιδιά.
6.3 Φροντίδα μπαταρίας
- Μην αποθηκεύετε τις μπαταρίες σε αποφορτισμένη κατάσταση για μεγάλα χρονικά διαστήματα. Επαναφορτίστε τις περιοδικά εάν δεν τις χρησιμοποιείτε.
- Αποφύγετε την έκθεση των μπαταριών σε ακραίες θερμοκρασίες.
7. Αντιμετώπιση Προβλημάτων
If you encounter issues with your electric wrench, refer to the following common problems and solutions:
| Πρόβλημα | Πιθανή αιτία | Διάλυμα |
|---|---|---|
| Wrench does not turn on | Η μπαταρία δεν είναι φορτισμένη ή δεν έχει τοποθετηθεί σωστά | Βεβαιωθείτε ότι η μπαταρία είναι πλήρως φορτισμένη και έχει ασφαλίσει στη θέση της. |
| Insufficient power/torque | Battery low or accessory not suitable | Recharge battery. Ensure the correct size and type of accessory is used for the task. |
| Η μπαταρία δεν φορτίζει | Charger not connected or faulty battery | Check charger connection to power outlet and battery. If problem persists, battery or charger may need replacement. |
| Αξεσουάρ που δεν ταιριάζουν | Incorrect accessory size or type | Verify that the accessory matches the wrench's chuck/anvil size and is designed for power tool use. |
8. Προδιαγραφές
- Μοντέλο: B0FLY6LF8C
- Μάρκα: Γενικός
- Τομtage: 21V
- Τύπος μπαταρίας: Ιόν Λιθίου
- Κατασκευαστής: Κλειδί
- Χώρα προέλευσης: Κίνα
- Συμπεριλαμβανόμενα εξαρτήματα: Electric Wrench, Battery, Charger, Drill Bits, Storage Case
Note: Specific torque ratings and other detailed technical specifications may be found on the product packaging or manufacturer's official webτοποθεσία.
9. Εγγύηση και υποστήριξη
For warranty information, product support, or to purchase replacement parts, please refer to the documentation included with your product or contact the retailer where the product was purchased. Specific warranty terms and conditions may vary.